
Dining Options are configurable through the Bite Admin Portal. Available dining options are specific to each POS and their configuration, so please reach out to support@getbite.com or your Account Manager if you have any questions around the feature. Below are a list of a few dining options typically available on the POS that can be synced and utilized in the Bite Admin Portal:
- To Go (kiosk)
- Dine In (kiosk)
- Outpost Pickup (kiosk)
- In-Store Pickup (Web)
- Curbside Pickup (Web)
- Outpost Pickup (Web)
To enable a dining option for a location, the desired dining option must be configured for use on the POS. After, Bite team member can help sync those Dining Options from the POS integration for your Bite solutions. After those Dining Options have been configured for use on Bite solutions, the Dining Options must be configured in the Bite Admin Portal in the below sections:
Under Flash Settings / Kiosk Settings tabs:
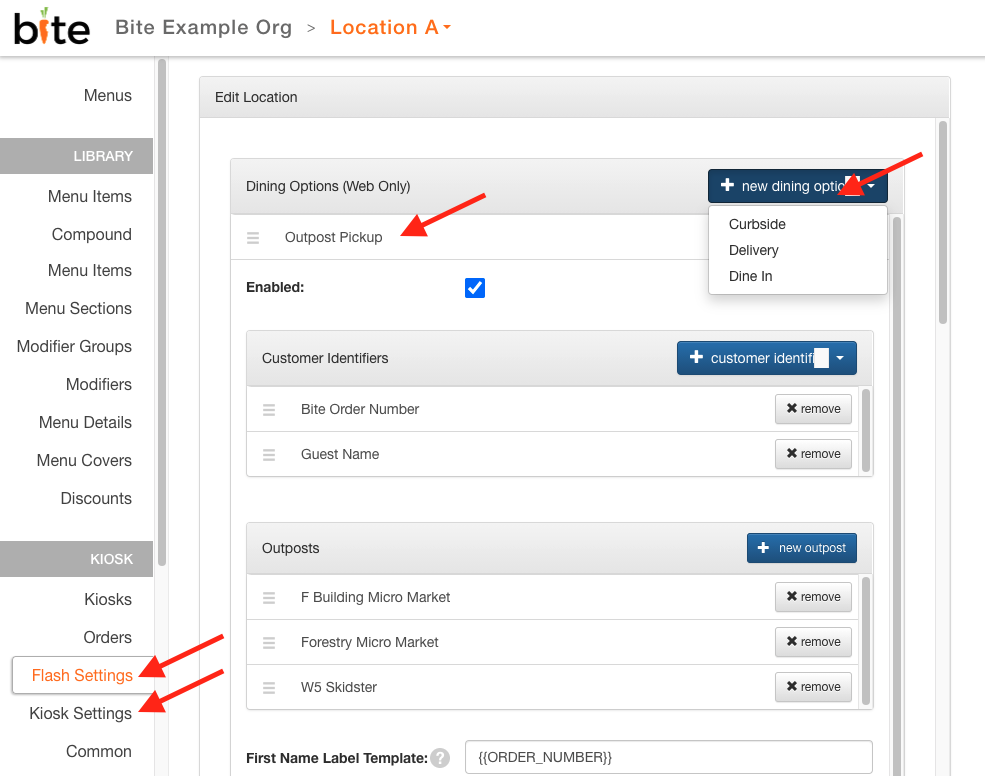
You will see the available Dining Options configured for Flash (Web) or Kiosk under the respective Flash Settings or Kiosk Settings tab. Dining Options configured for each product will show up under the Dining Options window. You can add a dining option by clicking on the "+ new dining option" button.
Under Menus tab:
Once the Dining Options have been configured in Flash Settings / Kiosk Settings tabs, you will need to configure the dining options to each Menu. On the Menus tab, you will see that under each menu, the Dining Options configured for each menu displays under the Day Part settings. (Please see screenshot below)
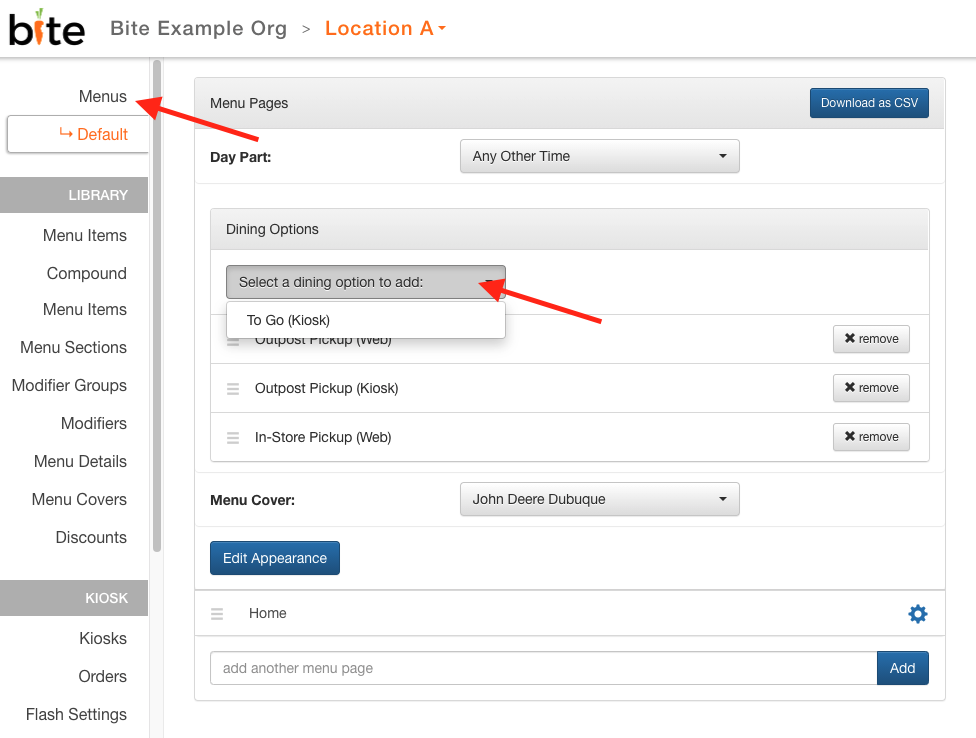
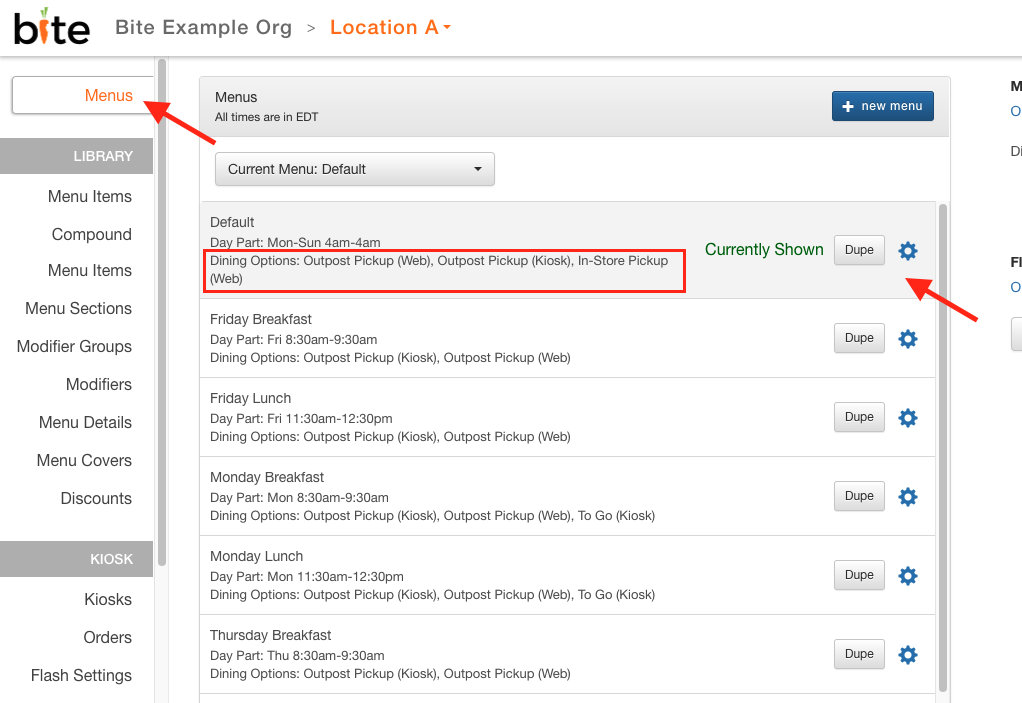 Click into the desired menu to add or remove the available Dining Options. This allows operators to configure different menus depending on the Dining Option that guests chooses at the beginning of their ordering flow.
Comments
0 comments
Please sign in to leave a comment.